There are several reasons why you might want to change your domain name in GreenGeeks. Sometimes, businesses rebrand and need a domain that better reflects their new identity. Other times, a more memorable or relevant domain becomes available, offering a chance to enhance marketing efforts. SEO considerations, such as keywords or local targeting, can also prompt a domain change. Additionally, mergers or acquisitions often necessitate a new domain to unify the web presence. Whatever your reason, it’s important to know how to change your domain name in GreenGeeks efficiently to ensure a smooth transition for your website and maintain your online presence.
I’ve got some inspiration from GreenGeeks’s Blog on this subject. But in my opinion, I found it is incomplete. So that’s part of the reason why I am writing this article.
This approach to change your domain name in GreenGeeks is the safest one as we create one more environment to transfer the site with new domain and to keep the old one as backup. So let’s get started!
How to Successfully Change Your Domain Name in GreenGeeks
Step 1: Back up your site
You can use any plugin you want for backup. One of the most prominent ones is the Updraft Plus plugin. Go ahead and install this plugin and activate it. I highly recommend this step. In the worst case, if something terrible happens, you will need to restore your site.
Step 2: Your New Domain
If you got your domain via GreenGeeks then the process will be simple and you can feel free to skip to the next step. Otherwise, if you wanted to point the domain from an external source like GoDaddy or Namespro, check out this blog.
Step 3: Setup the Environment for your New Domain
Once you successfully connect your domain name to GreenGeeks, Go to the cPanel of your server by clicking on the button “cPanel” next to Manage button.

Then go to domain section:

Click on “Create A New Domain”

You will end up on a page like this:
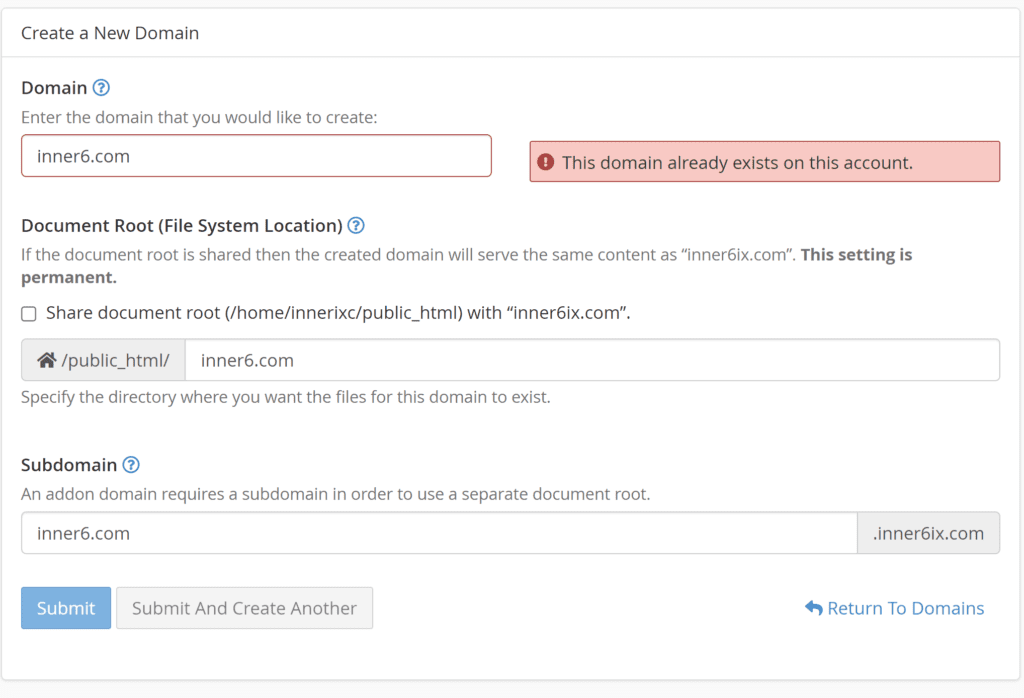
Type your newly added domain name here. I’ve already have that setup. Please note that, you should uncheck the check box where it says “Share document root(…”.You don’t want them to mess up the process. Then submit your domain. “inner6.com” is my new domain.
Go back to cPanel and head over “Scripts” section. And click “WordPress”.

This is a WordPress installation wizard for your site. This can ease your WordPress installation without any worries. It looks something like this:
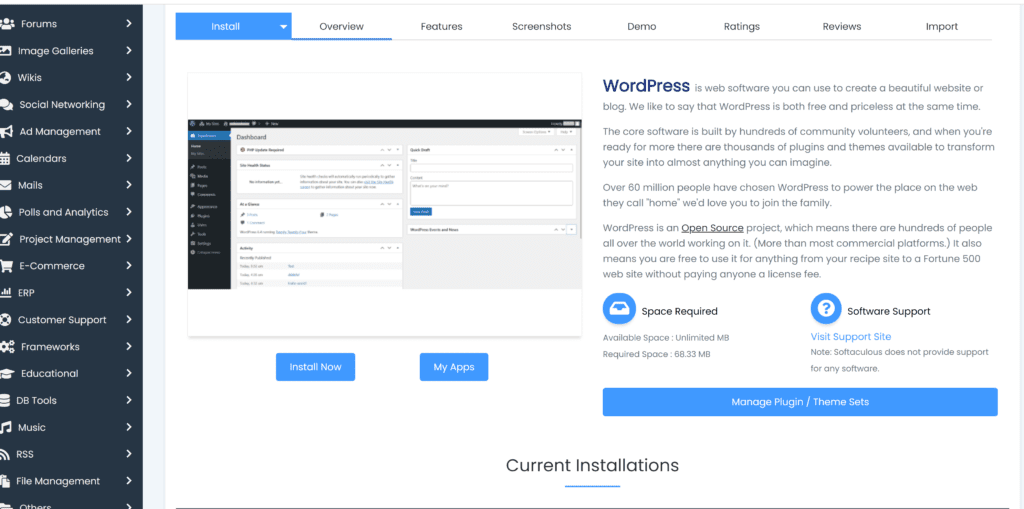
Now select your domain from the dropdown selector under the “Software Setup” section.
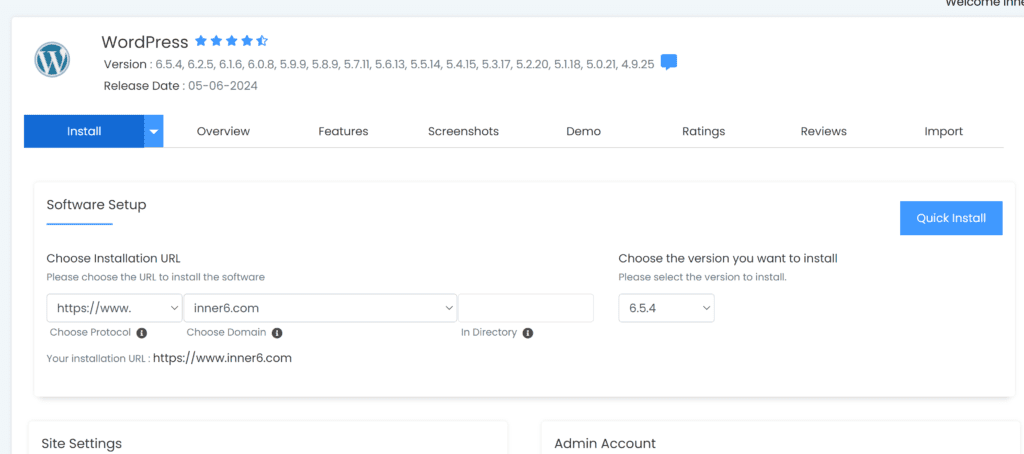
Choose protocol to “https://www.” and the domain to “yournewdomain.com”
Scroll down and write down your username and password. In the worst case, if any thing happens during the process you would need the login information. Just to be more cautious.
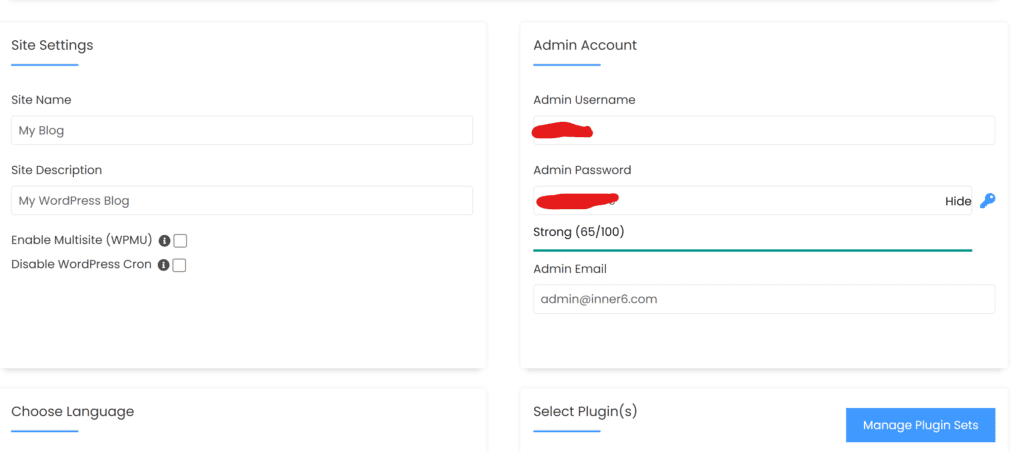
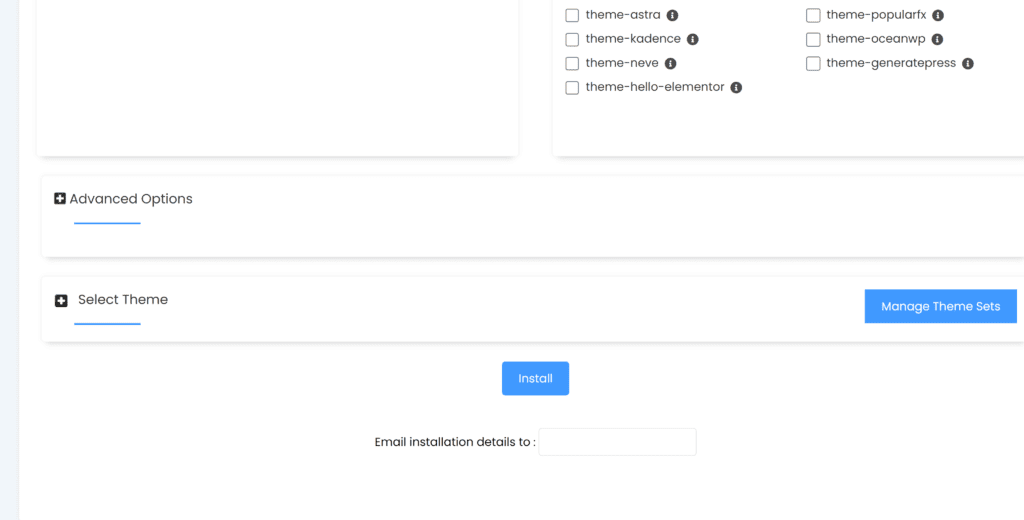
You are close to finishing the 3rd step. Next is to click install at the very bottom of the page. Scroll down and click “Install”.
Step 4: Install All in One WP Migration Plugin on Your OLD Environment.
Login to your old environment, install this plugin: “All in One WP Migration” Plugin and activate it.
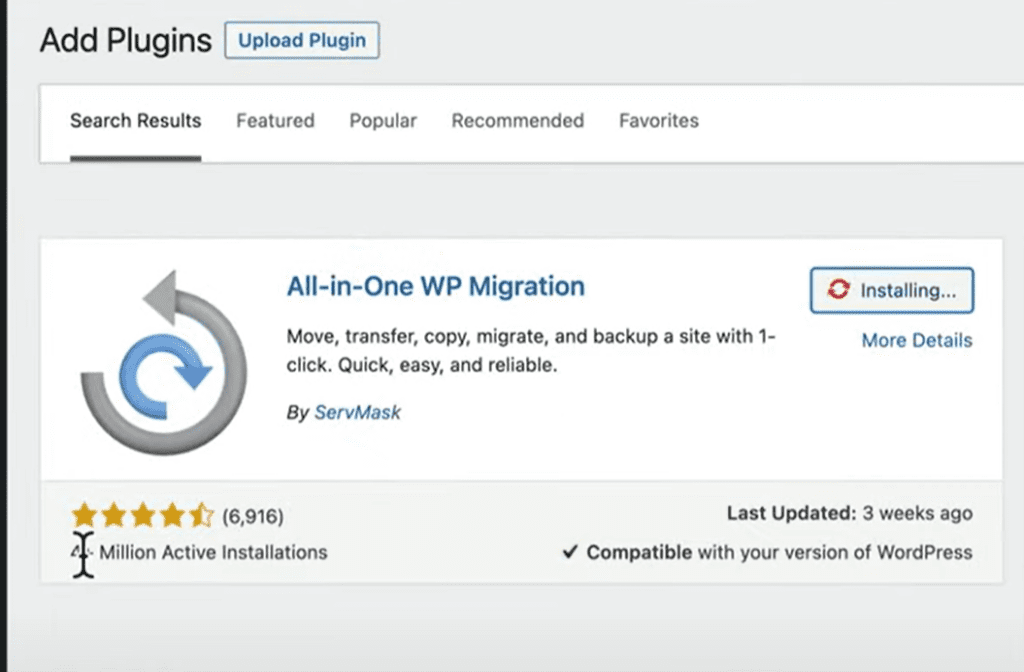
Go to “All in One WP Migration” -> Export. And then, export the site as a file.
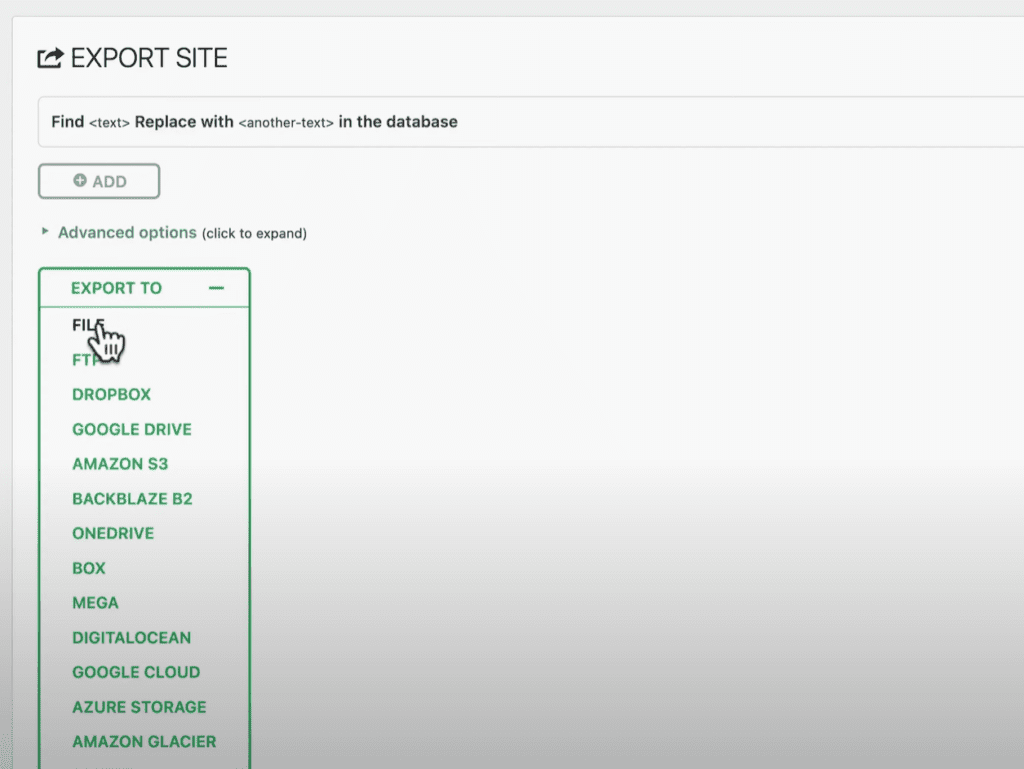
This may take several minutes depends on the size of the entire site. Once the export is completed, download button will be popped up and go ahead and download it.
Step 5: Go to Your New Environment and Install a Specific Version of All in One Migration Plugin.
The reason for this is that, importing your old site to new one using the free version of All in One Migration plugin has an upload limit of 300 MB. If your site is less than 300 MB, then you don’t have worry about any version. But, mostly sites have larger files especially due to media contents. I came to know about this technique through this video by Ferdy Korpershoek.
So basically download the specific version of the plugin from this link: ferdykorp.com/migrate. Upload this plugin and install it. If you don’t know how to upload a downloaded plugin check out this blog of mine. Activate this plugin. You can see that now the upload limit has been increased to 100 GB!
Step 6: Import your Downloaded File That We Exported from the Old Environment.
The file extension of this file is looks like this: yourwebsite-com-23121321.wpress. Go to All in One Migration plugin -> Import. Click on “import from” or drag and drop that file over here. Once you import, it looks something like this:
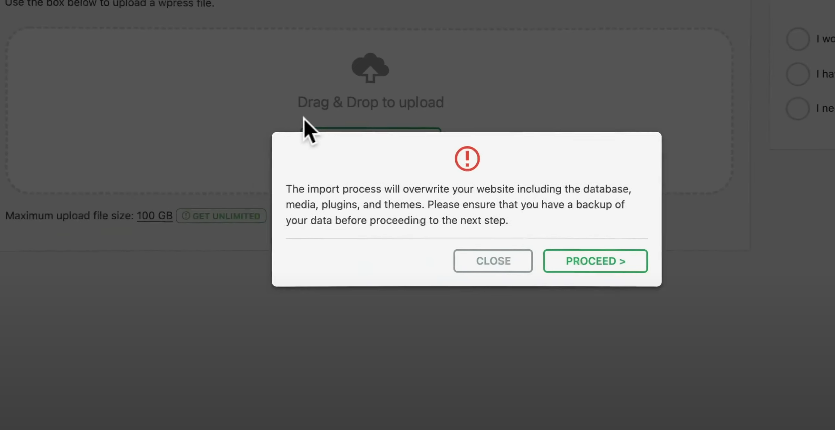
Click “Proceed” and then click “Close”.
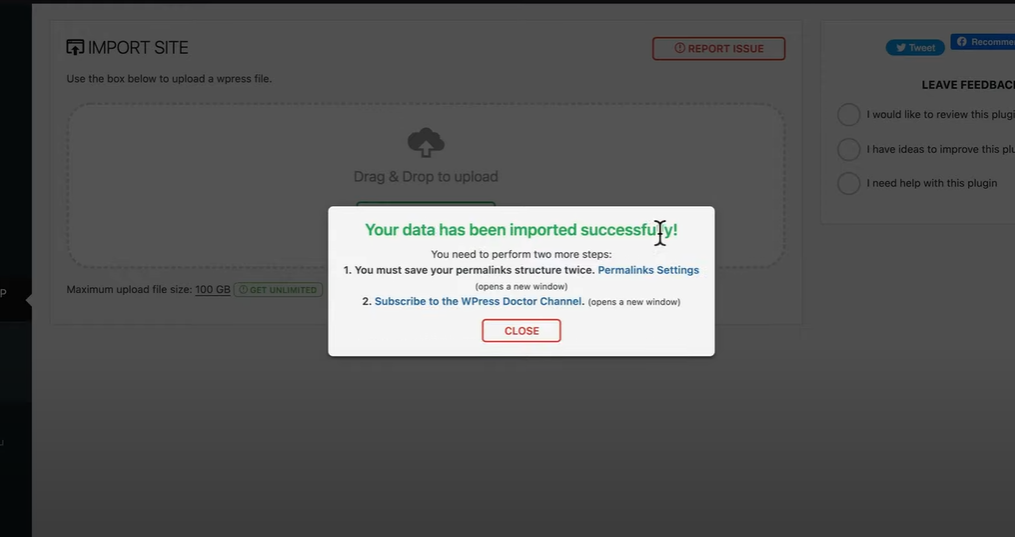
Refresh the page and now, you end up in WordPress login again. Here, put your old credentials and login.
Now, your website has been successfully transferred to the new one without any change. We have a few more important steps to complete.
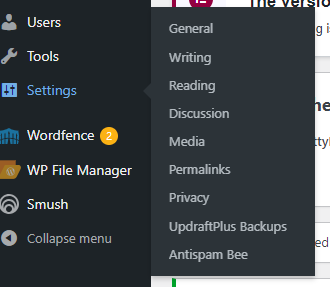
It’s time to update the permalinks twice. Go to Settings -> Permalinks.
Click “Save Changes” without changing anything in this page.
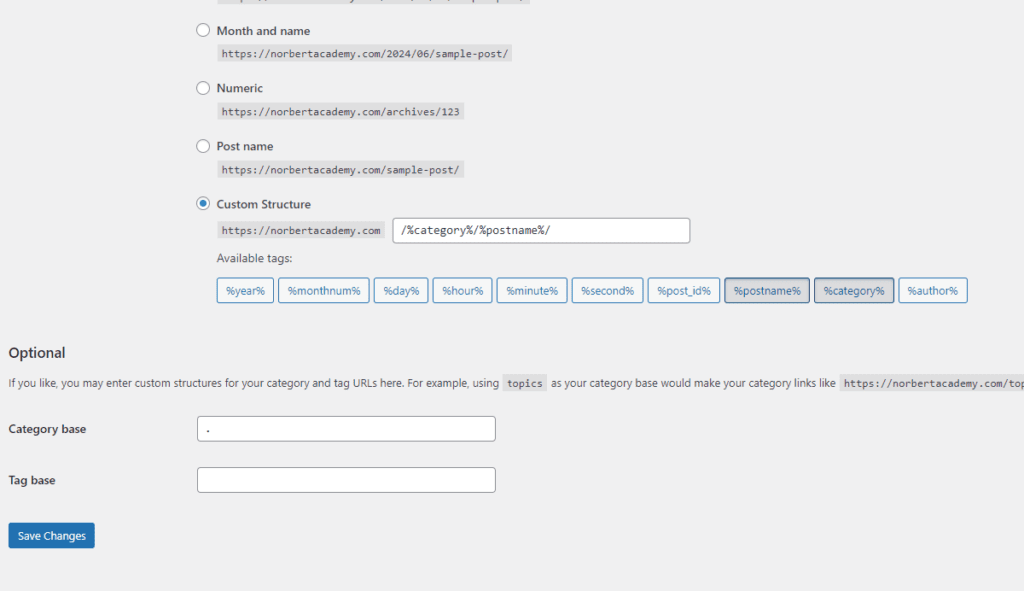
Woohoo! We have now completed the transfer! There is one more step to change your domain name in greengeeks.
Step 7: Add Redirect to Your Old Environment to New One.
You can either install a plugin that can redirect all the links with your old TLD or the safe way, that is, to simply edit your .htaccess file of your site. Go to the cPanel of your old site. And click on “File Manager”. Go the site folder and look for .htaccess file. Edit this file and add the following code at the very top line:
RewriteEngine on
RewriteRule ^(.*)$ https://domainname.com/$1 [R=301,L]
Replace “domainname.com” with your new domain name and save the file.
You have now successfully added redirection from your old domain to new one. And that’s how you can change your domain name in greengeeks.
Keep your old site as backup for atleast six months.

