Are you encountering a 403 Forbidden Error in your Power Automate flow while attempting to access an API Endpoint or a website? If you’re seeking a solution, you’ve come to the right place.
The solution outlined below is applicable to any hosting provider, but for this example, I will be using WPEngine as my hosting provider. Their services are exceptional and offer the capabilities to troubleshoot, back up, and maintain your site hassle-free. For this demonstration, I will be using a site hosted by them, which functions as an “Intranet”. Thus, for our topic on “Connecting our restricted WordPress site” with Power Automate, the steps can be a bit tricky.

Understanding the 403 Error
403 Errors typically arise due to permission issues. This error indicates that your URL has been correctly formulated; however, the website you are trying to access does not grant permission for further access. With this clarification, we can proceed to the next step in the process.
1) Retry the Flow
This is a crucial step to undertake. Navigate to your flow and initiate the test once more. After completion, make note of the time at which you ran the test. While it will certainly result in failure, trust me, this step will prove beneficial shortly.
2) Familiarizing Yourself with the Site You Are Accessing
I assume that you have complete access to the site to which you intend to send the request.
If you are using WPEngine, as I am, proceed to the environment containing your site, and then access the “Logs” tab. Within this tab, you will locate the “Access” section.

Here, you will observe the IP address from which the request has been received. In my case, it originates from 40.118.244.241. You might be curious about how I determined this IP address. It’s quite simple. All you need to do is examine the URL accompanying the 403 error. Within that URL, you will discover Power Automate’s request—the specific URL attempting to access the site!

If you are utilizing different hosting providers, you can contact your hosting provider’s customer support representative to acquire the IP address of the incoming request. Simply provide them with the URL from which the request could potentially originate.
Now that you possess the knowledge of the IP address
3) Add Access Rules
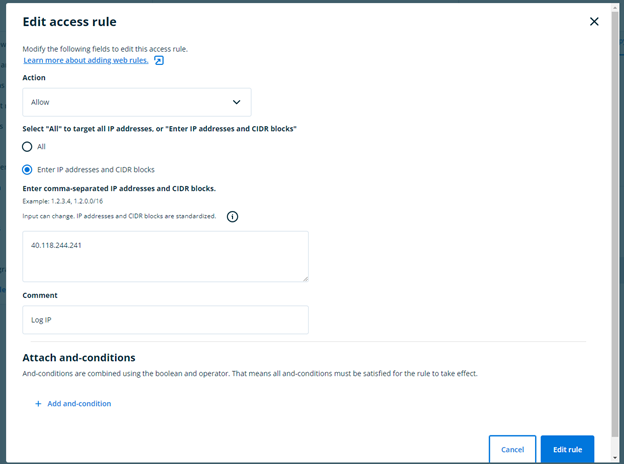
In the case of WPEngine, navigate to the “Web rules” tab within your environment. Like the “logs” section, this tab also comprises three sections: “Access Rules”, “Header Rules”, and “Rewrite Rules”. Our objective is to include the IP address we discovered within the “Access Rules” section.
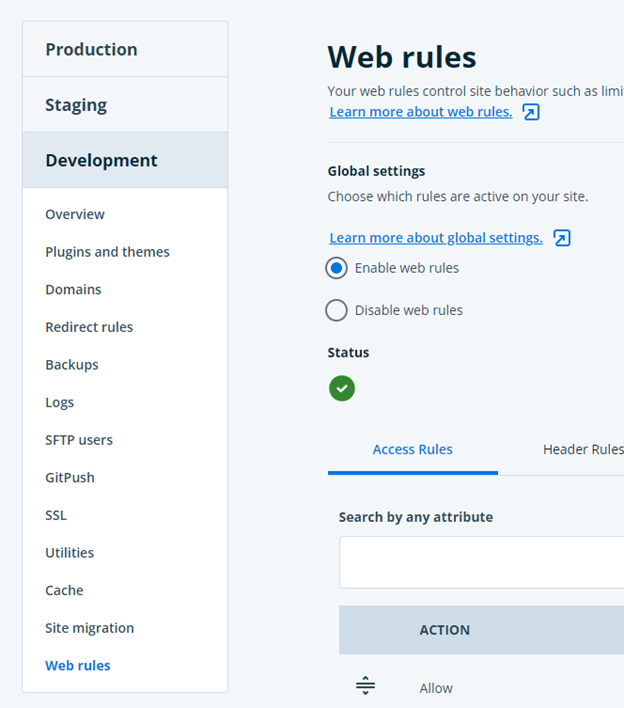
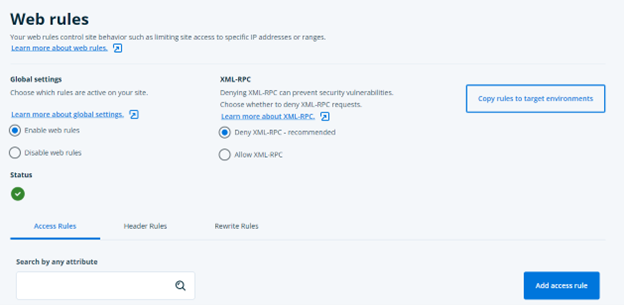
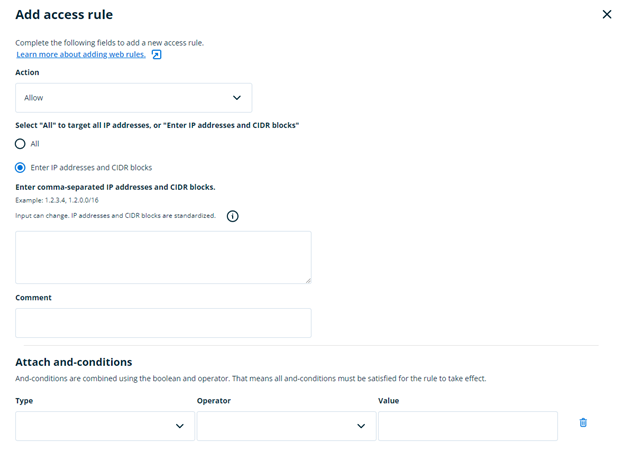
Since I have already added the access rule, you’ll notice that I have the option “Edit Rules” instead of “Add Access Rule”, although the fields remain unchanged.
4) Re-run the Flow again
Navigate to your Flow once more and initiate the test. I can assure you that it will function seamlessly.

That covers the essentials. I trust this blog has provided the assistance you needed to resolve the issue. If you have any questions pertaining to this topic, please don’t hesitate to share them in the comment section below this blog post.
Test your website speed here:
